The post introduces iNaturalist as a tool to record nature observations and education. This ‘cheat sheet’ explains its features, history, and roles for users. It outlines best practices for making observations, accessing the platform, and supporting its community.

- Crediting Sources
- History and What is iNaturalist
- You’re a Genus! – Uncertainty in identifications
- How is iNaturalist Accessed?
- The Human Components of iNaturalist
- Best Practices for Alberta Observations
- The Technical Structure of iNaturalist
- Observation Options
- Searching iNaturalist
- Beyond the App – the Cost of Doing Nature
- Obvious Things Worth Mentioning
- Notes and Further Reading
- Further Reading
Full disclosure, I am a newbie with iNaturalist and not really the botanist sort. Nevertheless, I like the application. I am also using the application in different contexts and projects. One such project is running a beginner’s introduction to the tool. The following post serves two purposes. It provides a handy guide for the workshop attendees and, secondly, a memory jog for me (and others) on how to make the best use of the tool.
There are numerous resources online which provide great beginner iNaturalist information (search on “iNaturalist beginners guide“). This post assumes you have installed the application, created an account, and have a basic awareness of the tool’s functionality. If you need help with this, iNaturalist has excellent resources as well, for example:
Crediting Sources
A bibliography is provided below but a huge thank you to Atlas of Living Australia for preparing an excellent guide to the tool on which portions of the following are based [1].
History and What is iNaturalist
The tool started as a master’s student project in 2008 and evolved into a citizen science initiative that now spans the globe [2]. In 2023, Canada was in second place behind the US for total observations and is likely still in that position.
What is iNaturalist
As to what is iNaturalist, here is the organization’s definition of itself:
iNaturalist is an online social network of people sharing biodiversity information to help each other learn about nature. It’s also a crowd sourced species identification system and an organism occurrence recording tool. You can use it to record your own observations, get help with identifications, collaborate with others to collect this kind of information for a common purpose, or access the observational data collected by iNaturalist users.
iNaturalist helps you identify the plants and animals around you while generating data for science and conservation. … by recording and sharing your observations, you’ll create research-quality data for scientists … [3]
Unpacking the above description, there are five parts of iNaturalist:
Organism Identification
The tool is used to help identify organisms. In this respect, it joins dozens of plant and animal identification tools, many of which are pay for use. These tools, including iNaturalist, use artificial intelligence (AI) to make a best guess of an observation.
See the discussion below on when to use the AI tool to make an identification and the iNat or iNot for what to observe.
Observation Repository
Assuming you save your observation, it adds onto an ever-growing citizen science data set and a travel log of sorts of where you have been and what you saw!
Social Media
You can build up a community of fellow observers and share in a passion of nature. An example of this is having others review and confirm (or suggest alternatives) to your observations.
Supporting Science
Peer confirmation of observations give validity to the data. As a result, iNaturalist is increasingly used as a tool for researchers and academics.
Supporting Organizations and Public Policy
As a large data set, the observations can help environmental organizations assess the biodiversity health of an area of interest.
You’re a Genus! – Uncertainty in identifications

If I have learned anything from hanging out with some good botanists is that the greater the knowledge one has the less certain in your identification. This may seem paradoxical but it makes sense. The taxonomy is a human construct we apply to a natural system. Organisms are in an arms race to eat, procreate, and not be eaten. Therefore, each species is changing over time even if that means eons in human terms.
As a result, avoid the temptation to select the AI generated suggestion. While it is probably right, it is not perfect. To get around this, iNaturalist allows you to select the genus which is one step above a species in the taxonomic rank. (Image courtesy of Wikipedia.org). Myself, I have decided to only select the genus given I am a bio-illiterate.
How is iNaturalist Accessed?
Recent statistics are not available but most likely the vast majority of people use it as a phone application (Android & Apple) while in the field. It can also be accessed via a web interface for research or recording observations after the fact. The tool is also integrated into other third-party tools.
The web browser version has the most features of the three followed by the Android and then the iOS versions. There are ongoing efforts to create a single iNaturalist application [4].
The Human Components of iNaturalist

Starting with the humans, there are four broad roles an individual can play in iNaturalist: User, Observer, Identifier, and Administrator.
User
Someone who uses the tool to identify a species but does not record it. Nothing wrong with staying at this level but there is so much more to the tool.
Observer
As the name suggests, a person who has made an observation, provided evidence (e.g. a photo), and saved all of this to the tool. The more observations you make the more credibility you have in the application.
Identifier
The AI Tool will provide a suggested identification for an observation but nothing like a human to confirm the identification. For the newbie, most observations will be straightforward; more esoteric species result in a more complex verification [5].
Administrators
Finally, there are the super humans who run the system. These are beyond the scope of this beginner guide. Because they are often volunteers – Thank You!
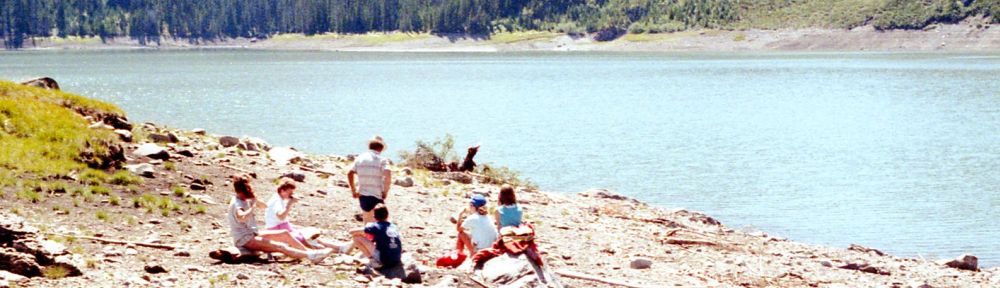
Best Practices for Alberta Observations
The general rule of thumb is to take multiple photos of the subject (e.g., plant, etc.) and include as much detail as possible. Specific suggestions are provided below for different types of organisms. Be sure to include a photo of the general area. Combine photos and audio if you manage to get both. [6]
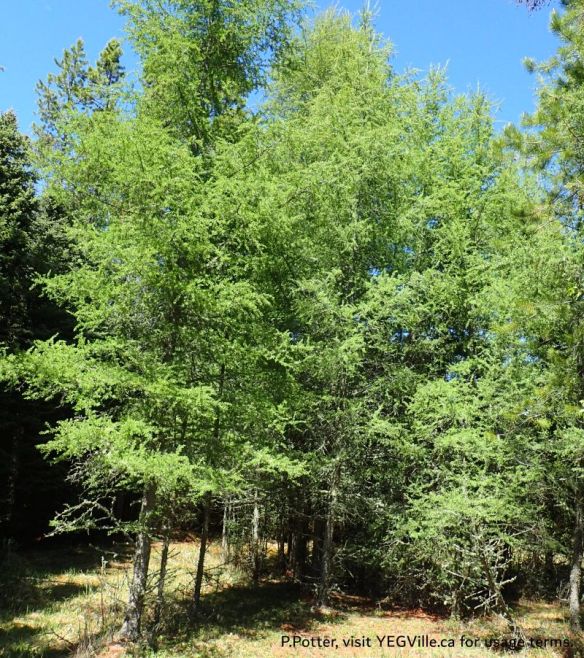
- Trees: Get a close-up of the foliage, both top and bottom.
- Try to find a cone, flower or fruit to photograph.
- Get a close-up of the bark. Finally, get a photo of the whole tree to show its growth habit.
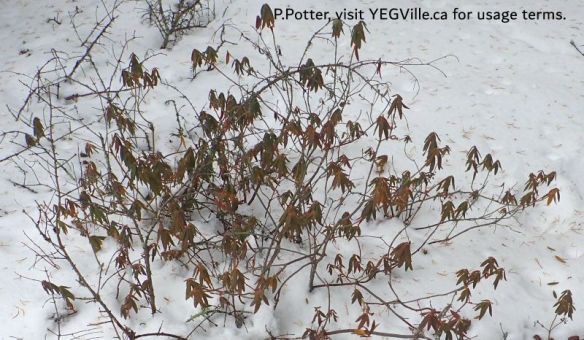
- Plants: A close-up of the leaves, stems, flower and fruit are all helpful.
- A shot to show habitat and growth habit is useful.
- Sometimes placing a sheet of paper or cloth behind the plant to isolate it will make for a cleaner, more identifiable image.

- Fungus, including lichens: Photograph the caps of mushrooms from above, and below to show gills or spore producing structure.
- A side view should show the ring and stipe (the stem or stalk).
- Take the cap home (if permitted), get a spore print, and submit a photo of it.
- Lichens fruiting bodies are also very helpful.
- Document the host species and habitat (e.g. where they are hanging out).
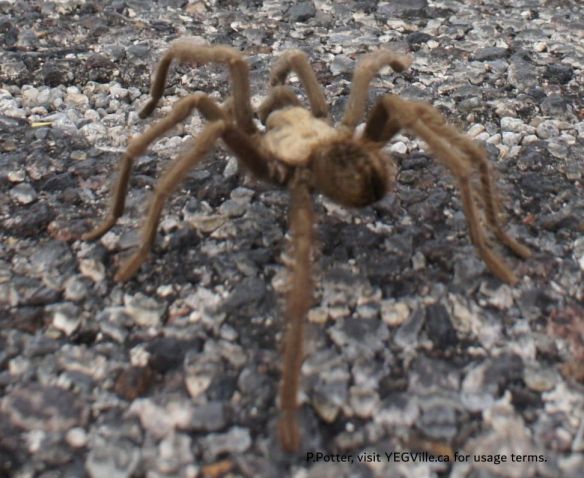
- Insects and arachnids: A test of your phone’s macro capability.
- Try to get a top, bottom, and side view.
- Most helpful is getting a photo of the mouth parts.
- Document the host species (e.g. where they are hanging out).

- Birds, reptiles, amphibians, mammals and fish: Get any shot you can.
- They don’t sit still for their portraits.
- Multiple photos are often useful for getting different aspects of the animal.
- Mollusks: If there is a shell, photograph all three axis.
- Snails are shy, wait for them to emerge for a photo.
- Get photos of both sides of a bivalve’s hinge.
- (Sorry, yet to photograph a Mollusk that I could find!).
The Technical Structure of iNaturalist
For the newbie user, there are three structures they are likely to use. There are four other structures a neophyte is unlikely to use but are include for awareness only. Of this list, the first structure, ‘Observation’, is the one a user will interact with 99% of the time.

Observation
- This is the basic unit for iNaturalist. Ideally it represents 1 Organism taken in 1 Location at 1 point in Time (OLT).
- Multiple bits of evidence can be provided in the observation but generally this means photos or possibly sound recordings.
- Worth repeating, provide as much detail as the mosquitoes swarming around your phone allow.
- Videos are not supported.
Project
This is a collection of observations. Typically, the collection is geographic (see boundary) but it may also include time (e.g. a bio-blitz held over a weekend).
Boundary
A geographic polygon identifying a particular area of the earth. Most boundaries you would ever need to use have already been created in iNaturalist. See the image below for an example.

Some other structures.
Journals
Essentially a blog post, how to share your enthusiasm and deep knowledge.
System Metadata
This information contextualizes the observations and includes things like location, taxonomy, and user-management. These are system defaulted with some user updates allowed.
Metadata – Annotations
Add important details about an observation… assuming you can answer the questions about the organisms sex, life cycle stage!. These are controlled by the Administrators.
Metadata – Observation Field
Essentially field notes about the observation. The one I plan to use frequently is ‘Invasive’ for when I photograph dandelions! You can add your own observation fields as well.
Metadata – Tags
Tags are yours to use as you please and aid in searching.
Obscuring
If you happen to observe a protected species don’t be surprised if some of the metadata is obscured. This is to protect it and prevent it from being harassed or worse. Another reason to obscure a location if the observation is from your backyard!
Observation Options
For the most part, the user interface of iNaturalist is very intuitive. Three fields worthy of note are:
- Captive or Cultivated: Not in its wild state. For example, a giraffe in a zoo, a flower in a botanical garden, or an elk on an elk-farm. See the aforementioned iNat or iNot?
- Notes: Enter to aid in identification, e.g. ‘large moth, blue colouring, long fangs, chasing me, AHHHHHHhhhh‘.
- Projects: Used when you are contributing to a project such as a bio-blitz.
Searching iNaturalist
So far, this post has been about contributing observations. The application can also be used to search for posted observations. This is done via the ‘Explore’ feature which can render results in a list or in a map display. The search function comes with some criteria already selected so ‘unselect’ criteria if you are not getting the results you are expecting. Nearly ever data field can be searched on, such as:
- Species: What does a flowerus-smellinicest look like exactly?
- Location: I am going to a Natural Area, what should I expect to see?
Beyond the App – the Cost of Doing Nature
While iNaturalist is free, it costs money to run. If you use the application and enjoy the functionality, considering providing both human and financial support. Human efforts includes writing code, curating observations, moderating forums, etc.
Financially, you can donate directly to iNaturalist. However, if you want a Canadian tax receipt there are two options:
- Send a donation to the Canadian Wildlife Federation noting there is no way to designate a donation.
- Closer to home, but more convoluted, donate to Nature Alberta and in the message box write: “For SAPAA – in Support of iNaturalist“. The Stewards of Alberta’s Protected Areas Association is an affiliate of Nature Alberta. It will consolidate all the donations and forward the monies to the Canadian Wildlife Federation with an iNaturalist designation.
Obvious Things Worth Mentioning
You know this but don’t post offensive content, be courteous to other users, etc. Remember, this is a social media tool, it has a long memory of any bad decisions you have EVER made.
The final way to support iNaturalist is to get out and make observations. I personally am focused on capturing the most common species imaginable. I am not confident to get into splitting identification hairs, so a spruce tree or a wild rose is my jam! Follow me: orgbio.
Notes and Further Reading
- Mesaglio, T (2024) A Guide to iNaturalist: An Australian Perspective, Atlas of Living Australia, Publication Series No. 12, Canberra, Australia.
- iNaturalist | Wikipedia.
- iNaturalist.org/pages/about
- Why are the iNaturalist apps so different… | iNaturalist
- When the identification is not entirely obvious, it follows this protocol: How do Identifications Work? | iNaturalist.
- Learning the Basics: Phone App | iNaturalist
